Friday, July 20, 2012

Freestyle Fridays - Manly

My friend Ron's birthday is coming up next week. So it was time to come up with a masculine card.

The color combination is Early Espresso, Pacific Point and Naturals White.  The Pacific Point layer was put through the Big Shot with the Argyle Embossing Folder.  On the layer of Naturals White the frame from Papaya Collage was stamped with Pacific Point Classic Inc.  The sentiment is from Word Play and that was stamped with Early Espresso.

For the inside

the birthday hat from Papaya Collage was stamped with Pacific Point.  Plain and simple and super easy to put together.

********REGINA'S MISSION********

Regina this week you are missioned to make a masculine card.  The theme can be of your choosing; birthday, graduation, happy engagement......
See Ya Next Week!

Friday, July 13, 2012

Freestyle Fridays

Good Friday to you from an area that is in a heat wave that has brought on "rolling" power outages, lightning and thunder storms, flash flooding and hail like golf balls.  Oh my what a time we are having.  Regina's creation this week is sure to cheer us all up!


As an added bonus Regina has used products from the upcoming Stampin' Up Holiday mini catalogue.  Head on over to her post here and see for yourself what can be done with dies and embossing powder.  Especially when you get inspiration from someone as artistic and creative as Regina.  Thanks for another awesome completed mission Regina! You never fail to succeed.

See Ya Next Week!

Friday, July 6, 2012

Freestyle Fridays

I was in the middle of making a card for today when my husband called to inform me that the mother of a woman he works with had passed away suddenly and could I make a card for all of his co-workers to sign.  I quickly changed the theme to a sympathy card. Sometimes I find these harder to make than a masculine card.


Sorry folks not much Stampin' Up today, except for the cardstock, as I just placed my first order from the recently released annual catalogue.  The base is Whisper White with a layer of Blushing Bride added, first ran through the Big Shot with the Sizzix Folksy Circle embossing folder. Then I stamped the Inkadinkado Floral Woodcut stamp with Black Craft Ink and embossed it with clear embossing powder.  I made a couple of die cuts (don't know which set this is from as the frame was on my table calling out to be used) with Pear Pizzazz, cut it in the middle of the design and used it to frame the image.

For the inside:


I stamped a sentiment from a My Favorite Things set called Clearly Sentimental using Basic Black ink.  This was stamped on Blushing Bride and punched with the Large Decorative Label Punch.  Placing it on the left of the card allowed  plenty of room for all co-workers to sign on the right.


********REGINA'S MISSION********

Regina your mission this week, and as always, should you choose to accept it, is to create using embossing powder with a die cut or two.  Can't wait to see what you come up with.

See Ya Next Week!

Saturday, June 30, 2012

Freestyle Fridays - Regina's WOW Crayon Resist

Have I told you lately how AWESOME Regina is!!!  She has completed another successful mission as this sneak can certainly attest to that fact.

Her blog post here has all the details.  The background she created, the layout and the color combination all scream creativity at its finest. Be sure to have a look and be truly inspired.

See Ya Next Week!

Friday, June 22, 2012

Freestyle Fridays - Crayon Resist

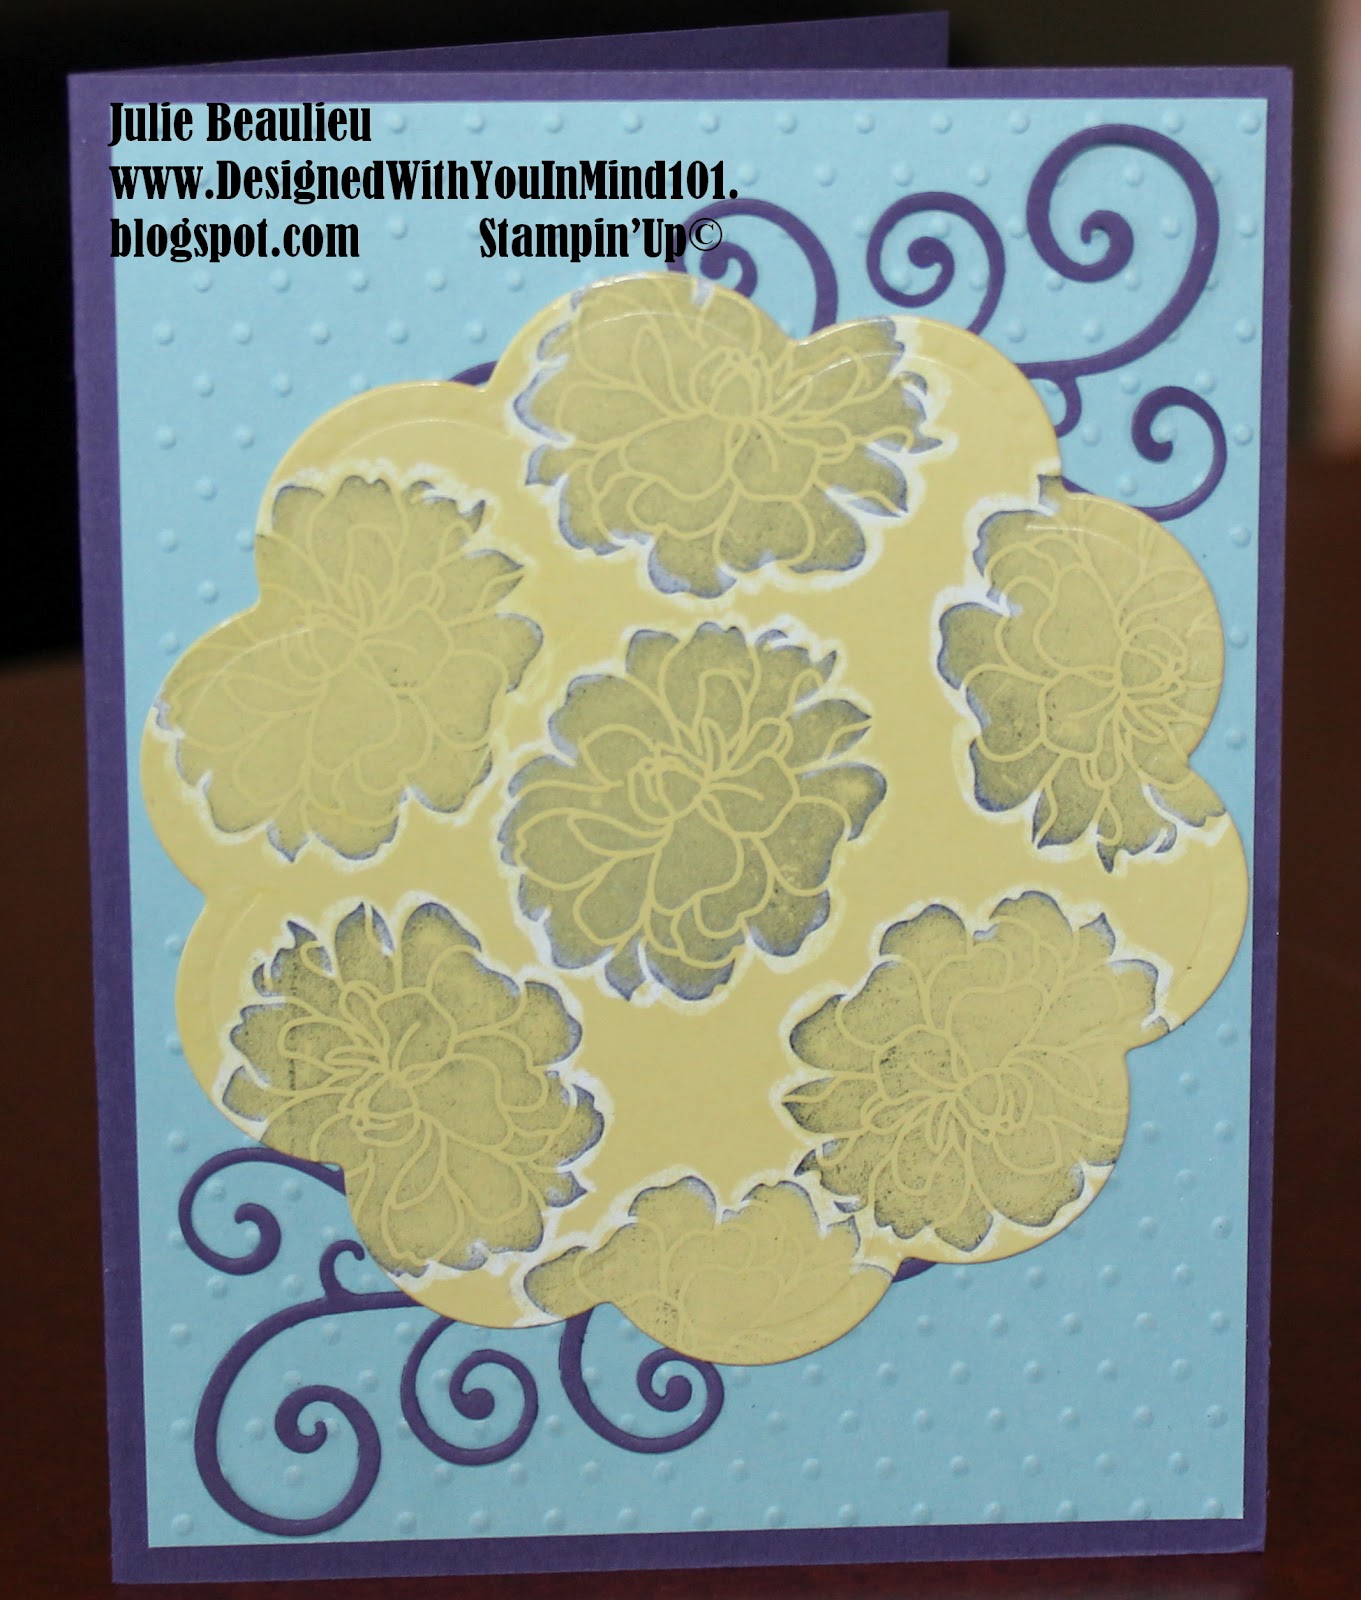
Did I struggle with this card!  I was the victim of over thinking and got myself into trouble choosing a color combination.  Time was running short to post for today's feature so I ended up settling on Elegant Eggplant, Baja Breeze and Summer Starfruit.  You will find this combination behind Summer Starfruit in the Color Coach which I keep at hands reach on my craft table.


I had  tried  Crayon Resist quite some time ago and wanted to revisit it in the hopes of coming up with a really WOW creation.  With regret, my over thinking got the better of me.  On Glossy cardstock I stamped the flower from Fabulous Florets with Black Stazon several times.  With a white crayola crayon I went around all the edges of the flowers.  Then I brayered all that with some Summer Starfruit classic ink.  The ink "resisted" on top of the crayola. That piece was then put through the Big Shot with a nestabilites layered on top of two fancy flourish die cuts.  (Jacoline, this is the die that Frankii sent you for your birthday.) OH, and the Baja Breeze layer was put through the Big Shot with the Swiss Dots folder. Sooo, that's it, that's all for this week.

********REGINA'S MISSION********

Regina for this week you are missioned to try the crayon resist technique.  I have discovered that the crayola need not be white, as long as it is a light color it will work fine. I wish you the best results!

See Ya Next Week!

Friday, June 15, 2012

Freestyle Fridays -

It's Regina's turn this week and she was to use the sponging technique and add ribbon.  Looks to me by the sneak below that yet again she came through with flying colors. 


This color combination is just awesome. Regina took the mission a step further by adding an embossing folder and sanding. For a complete picture and a step by step on how this came about click here to go to her post.  You are sure to be impressed and learn a thing or two or three as Regina is super generous in sharing her talent. Please take a moment to let her know that.  She would appreciate it and encourage her to share even more.

See Ya Next Week! 

Friday, June 8, 2012

Freestyle Fridays - Add a little Ranger

I've been "collecting" Ranger distress inks and thought it was just about time to unwrap them and give them a try.  With this card I went with Tumbled Glass, Iced Spruce and Black Soot.  A note on the Black Soot - it doesn't dry quickly! which was one of those live and learn and it could have turn into a big 'ole mess and thankfully it did not.


I used a lot of retired product so please don't cry or moan.  Have to use it up one way or another.  The base is Blue Bayou with a layer of Basic Grey rounded at the top corners.  On a piece of Whisper White I sponged Tumbled Glass and Iced Spruce until I was satisfied with the color combination.  With the Black Soot I stamped the flower from Love & Care 3 times.  The sentiment is from Fabulous Florets also stamped with Black Soot. 

The Basic Gray satin ribbon was sprayed with fabric starch and ironed until it was nice and stiff.  I ran it through the Big Shot with an embossing folder and wrapped it around the bottom of the Whisper White cardstock.  I love this technique which I learned quite sometime ago somewhere off the Internet.

And, on the inside, with Basic Gray I die cut the Tim Holtz Butterflight and measured it exactly to fit.


The cut was adhered with two way glue and fit perfectly.  I made two of these and sent one off to a friend in Quebec.

********REGINA'S MISSION********

Now for Regina's Mission.  What to do, what to do.......  Since you love ribbon let's go with that and add some sponging with 3 colors.  You can use as much or as little ribbon as you would like.  But most of all, HAVE FUN!  I know it will be creative.

See Ya Next Week!