Showing posts with label Feminine Fridays. Show all posts

Friday, December 17, 2010

Feminine Fridays

This will be this year's last Feminine Fridays post.  We'll be back on January 7th with a new mission and a few surprises. Regina and I would like to extend to you and yours the Happiest and Safest of Holidays.


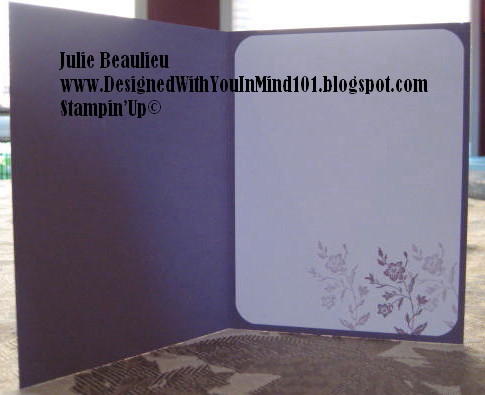
This is my first MDS card. I tried a few different elements and colors before I decided that this would be the end result.  Not bad for a few minutes of adding and deleting this and that. Not a WOW Regina style but considering that the install of the program is barely "dry" and I've spent less than an hour experimenting and exploring, not bad.

I've received two Christmas cards this week with the same poem and I thought I would share it with you.

Every time a hand reaches out to
help another
That is Christmas...
Every time someone puts anger aside
and strives for understanding
That is Christmas...
Every time people forget their
differences and realize their love
for each other
That is Christmas!

Merry Christmas and a Very Happy New Year!

Friday, December 10, 2010

Feminine Fridays - Regina's Mission

Well bloggers the multi-talented and awe inspiring Regina has done it again.  Her mission was to cover something in designer paper.  Here is a sneak peak.


To get a full view and the story behind this little gem please hop over to Regina's Blog Holiday preparations took hold of her time this week.  She entitled her post "My Feminine Fridays Quickie".  Wouldn't you love to see what she could create with just a smidge of more time?  When you're there please take a moment to leave her a comment won't you. 

See Ya Next Week!

Friday, December 3, 2010

Feminine Fridays

Here are a few more notebooks that I made for this year's Christmas Craft Fair that was held on November 20th.  I apologize for not taking pictures of the inside.
The flower on this one and the one below were sprayed with Glimmer Mist to give them a little shine.

It was this one that Betty and I suggested to the Australian Lady to purchase for her "honey" female co-worker  as opposed to the Honey Do one from Monday's post.
For the butterflies, I wrapped 10 gauge wire around the middle to give them antennas.  Some of these had pockets on the inside cover, some did not.  To make the pocket, I measured a piece of designer paper on the reverse side a half inch less than the width, put sticky strip on the sides and bottom.  Before adhering I punched a half circle in the middle. 

I know, I know, I've used retired designer paper again. I have so much of it I must put it to good use before purchasing the current ones.

The actual notebooks are the junior legal pads purchased at Office Depot. I found out yesterday that Office Depot will be no more in Edmonton.  WHAT!!! Say it isn't so!!!  There is only one store left in the West End and it will be closing on January 14th.  I am crushed as this is my favorite office supply store. I feel awful for the staff as most of them have been there since the store opened well over 10 years ago.

*** REGINA'S MISSION ***

Hey girl, got those closets sorted out yet?? :):)

Regina your mission is to take something such as  a notebook, a package of tissue, post-its, a CD, etc... and cover it with designer paper.  I bet you've got something brewing in your ever so creative mind already.
******

If you haven't been to Regina's blog yet make sure you click here to have a look.  You won't be disappointed.

See Ya Next Week! 

Friday, November 26, 2010

Feminine Fridays

Regina has completed her mission and what a triumphant success it is!  Her talent always catches my breath.  Here's a sneak:


For a full view and details be sure to hop over to her blog.  You won't be disappointed. And while you're there please take a moment to leave her comment. 

Thank you all for your fabulous comments on last week's Friday post.  Agent Frankii and I are working on our video skills and hope to bring you another one soon.

See Ya Next Week!

Friday, November 19, 2010

Feminine Fridays Week #17

It is time to pull out the mukluks and dust off the ear muffs people. WOWZERS it's a cool morning. Fresh, as Albertans describe it.  At the time of writing it is
-28C (-18.4F). I got the "are you kidding me" look from Frankii this morning when I opened the door for him. I'm positive if he could talk human he would have told me something like "not on your life am I going out there" or "I don't have to P that bad". 

Tomorrow is the Christmas Craft Fair that I signed up for exactly a year ago.  You have to get in early to get a table at this one. For the last month I have had nothing but issues making projects. The glue would ooze out, the paper was cut to short and so on and so on.  When I attempted to make tiles, the craft ink ran of the image under the glassy glaze for some reason.  I told my husband the issues I had and that I had thrown them out.  "Oh no" he says "I can use them for target practice".  So he dug them out of the craft room trash. Good thing it's only paper in there. I do have some that made the cut so it wasn't a total lost.

Today's project is one that I had planned on making 4 of. My friend Penny  (Hi! :-)  hooked me up with some awesome "feet" by Tim Holtz awhile back. Well, this is one of the projects that will go under the "issues" label. Unfortunately, the glue that was used, obviously a little too much, oozed out and does not have a nice finish to it. I'm happy with everything else though but not enough to put it on sale.


The only Stampin' Up supplies used here are the Mellow Moss and Early Espresso Cardstock and a bit of Afternoon Tea Designer Paper. The brown ribbon is also Stampin' Up. The lace ribbon is actually a $1 store find.

Here's a side view


I may add a few more things to it like some words from a Sizzix Die. It is definitely staying home tomorrow.

*** REGINA'S MISSION ***


Trying out a new format.  It's a little rocky and amateurish but fun all the same.

Make sure you go to Regina's blog to see what she's been up to lately.  She's been posting some most amazing projects.

See Ya Next Week!

Friday, November 12, 2010

Feminine Fridays

When I first did a mission for Regina, it was on a whim. Something that came to mind as I was typing my blog post that I thought Regina would enjoy doing once or twice. As faith would have it, she looks forward to it every odd week that I post. And I wait with anticipation to see what marvelous creation she will come up with.  Ladies and Gents, she never disappoints!  Here’s a  sneak peek of the front of the card for this week’s “use a gate fold and a stencil mission”.


You must click here to go to her blog and see what else she crafted. Oh yes! There is more to see and salivate over.  Regina made two cards PLUS, yes, there’s a PLUS, stencilled on a cabinet door that had been patiently waiting for her awesome creativity.
Regina, congrats on accomplishing yet another mission.  You are my queen!
See ya next week!

Friday, November 5, 2010

Feminine Fridays Week #15

Now that Halloween is over and we've received a bit of snow I thought I would start on Christmas Cards. This week features a card made with several punches and a gate fold.


I don't have any of the current designer Christmas patterns so I used a piece from a retired collection.  The base is Real Red, the green is Old Olive. Punches used were the Dotted Scallop Ribbon Punch, Two Step Bird Extra Large, just the wings, 2 3/8" Scallop Circle Extra Large, 1 3/4" Scallop Circle Extra Large, and the Circle Punch from the Itty Bitty Shapes Punch Pack.  On that circle I added some jewels from the Basic Jewels Rhinestones.

For the inside:


I mixed some Real Red Ink with White Shimmer Paint, applied with a Sponge Dauber using the leaves from the Vintage Frames Decor Stencil. With the same mixture stamped the sentiment from the Occasional Quotes Hostess Set.

Oh, and to keep the card closed, I used a Velcro dot.

Now Miss Regina, your mission should you choose to accept it :-) is to use a gate fold with a stencil. 

It's going to be awesome, I guarantee it!

See ya next week. 

Friday, October 29, 2010

Feminine Fridays Week #14

It's an even week which means it time to see if Regina fulfilled her mission.  Without a shadow of a doubt, she most certainly did. Here's a little teaser.


Be sure to click here to get to Regina's blog and have a full view of what she created with a retired set, Thankful Thoughts, Rose Red and Old Olive Kiwi Kiss Stampin' Up colors. She has all the details for you.

While I'm challenging Regina with these missions, she makes it seem so effortfless since she always comes up with such "WOW" and "jaw droppin' gorgeous" creations, she's challenging me in coming up with a mission that will inspire her creativity.

See ya next week!

Friday, October 22, 2010

Feminine Fridays Week #13

The weather in Alberta is sure fine these last few days. At least in the area where I live.  The nights are cool but the days are warm.  Keep it up!  We deserve it after the non-existent summer we had.

This week's card is not what was suppose to be.  I was trying to make a fan fold following a video tutorial from www.Splitcoaststampers.com I was having a heck of a time and the hour was getting late.  So the fan fold card turned into this:


The only thing that I kept from my original plan are the colors.  The card measures 5 x 5. The base is Textured Rose Red. On the Whisper White Layer I stamped the retired background stamp, Filigree, in Old Olive.  I absolutely love Rose Red with Old Olive. I use it quite often. I made a mat in Old Olive and to that attached piece of Whisper White which was first stamped in Rose Red with the ballerina from yet another retired stamp set, Dance Sketches.  This is one of the first stamp sets I purchased when I started to make cards, oh, 5-6 years ago.  Still love it to this day.  In the corners I added Jewels from the Basic Rhinestone pack to give it a little bling.

And now on to Regina's mission.

Use a retired stamp set that you treasure (we all have at least one, or maybe two, or three...) using Rose Red and Old Olive, plain or designer paper.

******
Before I leave you for this week  I thought I would share with you what Frankii does when he comes back from spending the day with his girlfriend.

That Dolly sure wears him out. That's what happens when you date a younger chick. He runs in the house, has a drink and straight for the couch.  Could be a really bad cliché.  It's barely 5:00pm! And don't even talk to him..... :):)  How he can sleep comfortably like this is beyond me.  The boy's a hoot.

See ya next week!

Friday, October 15, 2010

Feminine Fridays - Regina's Mission

Prepare to be WOWED blog fans!  Regina's mission was to use designer paper as a focal point.  Here is a sneak peak.


For a full view and to have your socks completely blown off click here.  Regina has included a "how to" for this pure work of art. 

BRAVO REGINA! on a very successful completed mission.

See ya next week!

Friday, October 8, 2010

Feminine Fridays Week #11

I've always wanted to try the Origami Shadow Box so I created this one for my World Card Making Event last weekend. I was quite happy with the "it's easier than it looks" response. You start with a piece of 4x4 double sided designer paper. Fold in half, open it, fold in half the other way. This will give you a center. Make a cross in the center with a pen. Then take a corner and fold to your marking. Do this to all corners. Once that's done bring the tips to the fold of the outer edge. You have to make sure that your folds are perfectly straight otherwise your folds with not meet evenly.  Don't forget to use your Bone Folder to get crisp clean lines.


The stamp set used is Charming, the sentiment is from Teeny Tiny Wishes. The colors are Perfect Plum and Whisper White. On the Whisper White the image was stamped fully inked then stamped again before adding more ink. The punches used inside the frame are the 1 1/4" in Whisper White  and 1 3/8" in Perfect Plum.  For the sentiment the Modern Label Punch in Perfect Plum and the Word Window in Whisper White. Added a little bling from the Rhinestone Jewels.


On the inside a Whisper White layer was added and stamped in Perfect Plum using the same flower from inside the frame on the front. The corners were rounded with the Small Corner 3/16" Punch.

And now for Regina's Mission: Create using Designer Series Paper, current or otherwise, as the focal point.

In  the meantime make sure you drop by Regina's Blog to see what she has been up to this last week. She made some very thoughtful and caring cards for her parents.

Before I leave you for today, here's a pic of Frankii


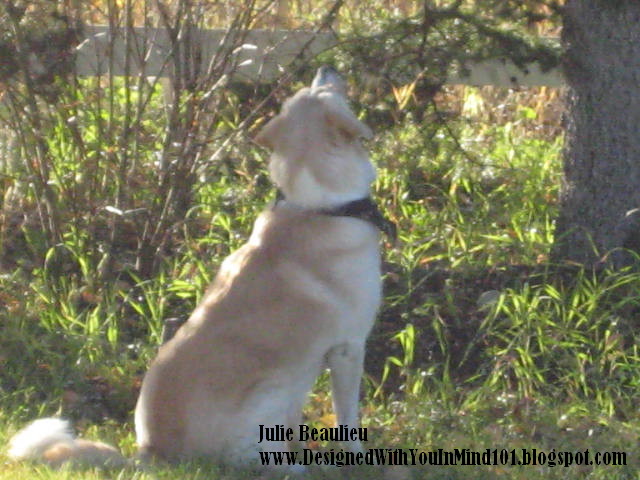
He's changed his position from the tailgate to the tree. He's determined to have that squirrel play with him. He spent the afternoon here yesterday and by afternoon I mean ALL afternoon.

See ya next week!

Friday, October 1, 2010

Feminine Fridays Week #10

WOW!! is all I can say about Regina's mission this week. You blew me away Regina!! From this one I can see that I am going to have to make the missions a little more challenging perhaps. She nails it every single time. Here's a sneak peek. Click here to see her blog post and get all the details.


It's been a hectic week around here and the weekend will be the same.  Tomorrow is my World Card Making Day Event and all is ready to go. It should be a really good day.  Frankii's been busy too. He's been trying to catch a squirrel in the front yard and stands on guard on the tailgate waiting to catch his prey.  He hasn't yet and I am sure he is finding it quite challenging.


Can't say that I've ever seen him more focused than this. Nothing is going to distract him! He can sit here for an hour and barely twitch. He's probably feeling more like a tracker with his new camo scarf. At least now we know where he is and not running across the road to play with the Alpacas.

See ya next week!

Friday, September 24, 2010

Feminine Fridays Week #9

Feminine Fridays is already here! This week seems to have gone by at lightning speed.  Thankfully the sun has returned and hopefully will stay for awhile. It sure has been dreary in this part of the world. For this week I choose to do somewhat of a CASE from the Stampin' Success Magazine (sent to demonstrators only).  In the July 2010 issue Lynn Pratt was featured on pages 8 and 9. I fell in love with the color combination and the design. This card measures 9 x 4 1/4.  


I used the same colors that Lynn did except for the Natural Ivory, I don't have any so I used Very Vanilla. The other colors are Bravo Burgundy,  Basic Grey and Always Artichoke. Besides making the card a different size I changed it up by using Photo Corners done with the Punch in Bravo Burgundy and did not use a layer to stamp the Thank You. The images are from the stamp set Just Believe.


Inside the card I added a layer of Very Vanilla and stamped the leaves in Basic Grey and Always Artichoke. I gave this card to my Upline Wendy to thank her for swapping cards for me at Convention this year.

***REGINA'S MISSION***

Choose something by a featured stamper in Stampin' Success
and make it your own. 

******

Be sure to drop by Regina's blog next week to see what she comes up with. It's sure be to be jaw dropping gorgeous!

See ya next week!

Friday, September 17, 2010

Feminine Fridays Week #8

Regina has completed her mission and What A Beauty!  Here's a little peek.


Click here to get the details on this amazing creation that was prepared for your viewing pleasure. While you're there make sure you have a look around at the other creations Regina has posted.  It's full of Wow Factors!

See Ya Next Week!

Friday, September 10, 2010

Feminine Fridays Week #7

It's Friday and it's my turn!  Before I reveal this week's card, I have a mission for Miss Regina.   Your mission for next week, should you choose to accept it, is to make a project using 3 colors and 3 stamp sets, current or otherwise.  This kind of statement is usually followed with something like this message will self destruct in 10 seconds and Regina should be running from a car but I kinda like my blog -- except for the header that I'm still working on --   :) and Regina's blog :):) and besides she's got enough on her hands right now she does not need to add running to her schedule :) so let's just leave it at "should you choose to accept it", shall we.  

On to the card. I must say that I am trying really hard to stick to current items.  When I am in my craft room I never pay attention to what is "in" so I am trying to make a conscience effort.  I choose 3 colors for the cardstock: Rose Red, Olive Green and Very Vanilla.


That's candles sticking out behind the card, not part of it - sorry about that. I then choose 3 items to use with the Big Shot: Scallop Circle #2, Vintage Wallpaper Embossing Folder and the Embosslit Beautiful Wings.  Are you starting to see a pattern on the 3's??  When I inked up the bird from the Always set I first applied Rose Red Classic Ink, then with a paint brush, gently added White Shimmer Ink and stamped on the Very Vanilla Scallop.  I adhered this part with Dimensionals. Unfortunately my favorite light to take pictures under is still not fixed (it's on the Honey Do List) so I was not able to capture the actual shimmer to the bird.   So my three ink colors are: Rose Red, White Shimmer Ink, and Olive Green - used on the inside of the card.

The 3 stamp sets consisted of: Always, Tiny Tags and the Hostess Set Occasional Quotes. I am going to deliver this card to the lady that always greets me in such a warm and friendly manner everytime I walk into my local Save-On-Foods. I made of point of making note of her name last time so that I could really personalize the card. This woman is super at what she does and it's refreshing to meet someone who really enjoys her work and it shows. 

See Ya Next Week!

Friday, September 3, 2010

Feminine Fridays Week #6

Regina has accepted "the mission" and what an accomplishment!  Oh My, what a beauty she created! Below is a sneak peak. Head over to her blog for a full view and details. There's a hint of a new mission also. Absolutely AWESOME Regina!


Before I leave you for today, I thought I would share a picture of Frankii and his Dolly at play. Since this picture was taken she's outgrown the collar she was wearing at the time and as of this past Wednesday, was almost as big as Frankii.  She's growing fast!


It's just too precious when she greets him as he walks through the door. He's never been kissed so much in his life!  And I kiss him a lot!!!

See Ya Next Week! <--------Which Mission shall I choose???

Friday, August 27, 2010

Feminine Fridays Week #5

Did any of you notice that Regina and I used the same stamp set, Just Believe, in the last two Friday posts?? It wasn't planned, it just happened.  Sooooo, My Stampin' Sista, your mission, if you choose to accept it is to use a stencil next week :)  Good Luck! 

Received a box of new items from the new mini going live on September 1st so I thought I would try something with the new Decor Stencil - Vintage Frames.  You'll have to wait to see the full stencil until then but if you already have your mini catalog check it out on page 22.


This stencil is quite large, 8 1/4 x 8 1/4, with 3 different designs.  To ensure that the stencil did not move when I sponged Cherry Cobbler Classic Ink I taped it down with painters tape. It held it perfectly in place. I also made sure my Crumb Cake base was straight by using a ruler. I ran the Sizzlit Little Leaves through the Big Shot twice with Pear Pizzazz. Then ran the Embosslit Flower Burst with Cherry Cobbler. Adhered those three pieces in the middle of the frame. Carefully added little dots of White Shimmer Paint using the smallest tip of the Stylus to give it a little sparkle. The last thing I did to the front was stamp the Hello from Pendant Park. My hand moved slightly when I had the stamp down on the paper and it came out a little blotchy...URGHH. Why is it that this seems to happen only on the last step??


On the inside I added the butterfly from Dreams Du Jour in Cherry Cobbler and Pear Pizzazz. There you have it, this week's card. And, I used all current stamp sets! That has to be one for the books!!

See ya next week!

Friday, August 20, 2010

Feminine Fridays Week #4

Well here are at week #4 already.  Regina has a beauty of card for you this week. Hop on over to her BLOG and get a full version and all the details. Here's are a bit of a teaser.


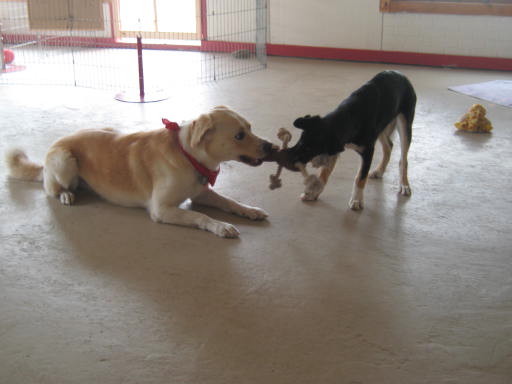
Frankii sure has been busy these last couple of weeks.  He has a new girlfriend.  Her name is Dolly, a 4 month old Shepherd X Husky.  Thanks  to Debbie, groomer/daytime guardian Extra-ordinaire, who's been capturing quite a few fabulous Kodak moments,  here he is sharing his beloved tennis ball.


Frankii's had a rough 6 months so it's so good to see him so happy. I like to think by the look on his face he's saying "there you go my love, you play with it for awhile".  Is that wedding bells I hear......   

See Ya Next Week.

Friday, August 13, 2010

Feminine Fridays Week #3

This week we, Regina and I, bring to you a rather rare technique.  If it's out there, it's hiding. While I was going through my craft room deciding what to put up for sale in the Garage Sale tomorrow, I came across a technique in a magazine that I had put aside to try. The next time you come across a pretty napkin/serviette keep it as you may want to try this. 


I pulled the pattern off the napkin, this was a three ply and it came apart quite easily.  I then cut a layer of Elegant Eggplant at about 3x4, sprayed it with EZ Spray Mount, then layed the napkin over top and smoothed it down with my hand for an even finish. I trimmed the edges with my Tabletop Paper Cutter.  Put that aside to let it dry a bit. Meanwhile on a base of Very Vanilla stamped the image from Just Believe in Elegant Eggplant. Having this set in Clear Mount sure made it easier to decide which part of the image would go where. I layed the napkin layer over top and added a sentiment from the Hostess Level 3 Set, Occasional Quotes, stamped in Elegant Eggplant on a tag from the Sizzlit Die - Lots of Tags. The flower was made from pages of an old book using the 1 3/4 Scallop Circle Punch. Before I put a brad in the middle to hold it together I used a sponge dauber to add some Elegant Eggplant and also sprayed some White Shimmer Paint mixed with water to give it some highlights.


On the inside I simply stamped the same image used in the front at an angle.
Make sure you drop by Regina's blog to have a look at the fabulous Drawer Boxes she created last weekend. Gorgeous!

See Ya Next Week!

Friday, August 6, 2010

Feminine Fridays Week #2

It's Regina's turn at the designing table this week. Here's a sneek peak. 


Be sure to CLICK HERE for all the details. While you're there have a look at "My Craft Room" on the right hand side. Mine looks just like that HAHA with the exception of drywall. Maybe one day, it's a work in progress.  


Frankii, oh Frankii! He decided to take a tour in the field across the road, again! with the cows, llamas, and a horse or two.  Came back smelling somethin' awful, again! He's can be a handful :) It's his favorite thing to do next to chasing and digging after gophers.


Here he is in his house on a time out.  Looking a little sheepish isn't he. He's all cleaned up and ready for action, in another 15 minutes that is.  We're going shopping for a new collar today.  The one he has now says "Bad to the Bone". Maybe that's just a little too suggestive for him LOL.

See Ya Next Week!