I've moved over to wordpress. You can check out my new blog here
https://designedwithyou.blog/2018/08/09/im-celebrating-10-years/

DESIGNED WITH YOU IN MIND 101.............COMMENTS ALWAYS APPRECIATED.......
Thursday, August 16, 2018

Monday, October 30, 2017
Manly Mondays
I had originally planned to use this card for Throwback Thursdays. Time got away from me and I did not get a chance to make a post it. It seems fitting for manly card even thought the stamp sets used are retired so here goes.

The base is Barely Banana covered with a piece of Early Espresso that was embossed in gold using the Bamboo Background Stamp. Stampin' Up used to print the year on the sticker for the stamp. This one says 2000. This was before Stampin' Up came to Canada. Oh My !! For the sentiment "Celebrate", also embossed in gold, from Love Sparkles, a piece of Barely Banana was placed behind Early Espresso that was adhered using Dimensionals to give the card some depth. All that embossing is much more shiny in real life.
Until Next Time !
Monday, October 16, 2017
Manly Mondays
On Thursdays I set up at a bakery near my home and do Coffee and a Card. This week we will be using the stamp set Feather Together. This is one of the cards we will be doing.

Starting with a base of Dapper Denim Cardstock I layered a piece of Eastern Palace Specialty Designer Paper measuring 1" x 4". On Whisper White Cardstock measuring 3" x 4 1/2" with Dapper Denim Classic Ink one of the feathers was stamped 5 times. The Happy Birthday sentiment was added using Memento Tuxedo Black Ink. Before adhering this to the card I took a new pencil and dabbed the eraser part directly into the Dapper Denim Ink Pad and added "circles" to the base to give it some texture. Rather pleased with the effect.
To purchase any of the product used above please go directly to my store here (Canada only). I'll send you a little gift for doing so.
Drop me a line when you are able to join on Thursdays from 1:30 to 3:30 and I'll make sure that there is a seat available for you.
Until Next Time !
Monday, October 2, 2017
Manly Mondays
On the weekend I happen to catch an episode of The Fresh Prince of Bel Air. Will had on a shirt that inspired this card. I have to tell you, it did not go in the direction that I had planned out. I was going to start all over but then the more I looked at it the more I liked it.
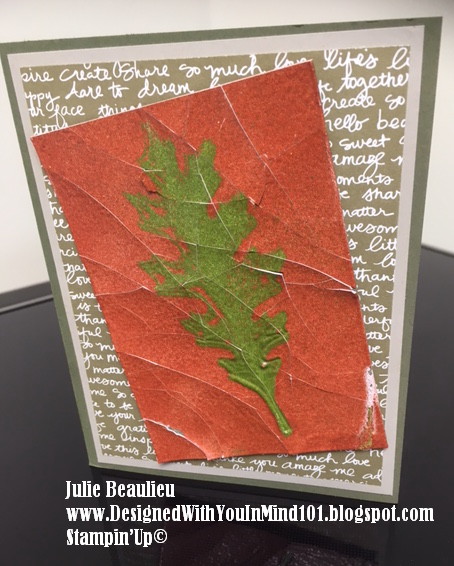
On a base of Always Artichoke I adhered a layer of Sahara Sand, followed by a layer of Always Artichoke Designer Paper. By doing that the Designer Paper almost looks gold. On a piece of Always Artichoke I applied VersaMark then a light orange embossing powder (that's been in my craft room for what seems like forever) that made me think of the colors around us right now. I repeated the process roughly 8 times. The leaf from Vintage Leaves was stamped with VersaMark then added to the embossing powder while still hot and left there for a minute.
I did not get the impression I was going for. So I walked away from it for a while. When I later picked it up it cracked. Well, I thought, why don't I over emboss the impression with green embossing powder. So I did that and once it was dry I cracked it some more. Tilted it to add to the card with dimensionals since the layer is quite thick with all the embossing.
In the end I am quite pleased with the result. Hope you think so too.
Until next time !
Thursday, September 28, 2017
Throwback Thursdays
This week I decided to have a go at the Gentler Times stamp set that first appeared in the Winter Mini Catalog of 2003 - 2004. This set was only around for 3 catalogs.

I've often used the heart for a Valentine card, congratulations on your engagement and weddings. For this week I went for something completely different.
On a base of True Thyme I added a layer of Brushed Gold. Yes, I have a lot of these 2 colors in my stash. Before I added a layer of True Thyme I embossed the filigree stamp with Gold Glory embossing powder on each side. The flower was stamped 3 times on True Thyme, also embossed, then punched with the 1" square punch and attached with dimensionals.

Unfortunately I could not capture the actual shine of the gold embossing with my iPhone camera. I'll be sending this card to someone in the near future, for which occasion, I'm not sure yet.
Hope you have found some inspiration to use this set, or a similar one that you may have forgotten you had.
Until Next Time !
Monday, September 25, 2017
Manly Mondays
When I was thinking of a card for today I knew I definitely wanted something that would POP. I sure did use a lot of product.

On a card base of Early Espresso I added a layer of DSP from Year of Cheer. Before adhering it I attached a strip of Burlap Ribbon with some Copper Trim on top. On Garden Green, Daffodil Delight and Cajun Craze the leaf stamp from Painted Harvest was embossed in Gold. I punched those out with the leaf punch and used Multi Purpose Tombow to glue them behind the Burlap Ribbon.
For the sentiment two images from Label Me Pretty were embossed in gold, punched with the Pretty Label punch and attached with dimensionals.
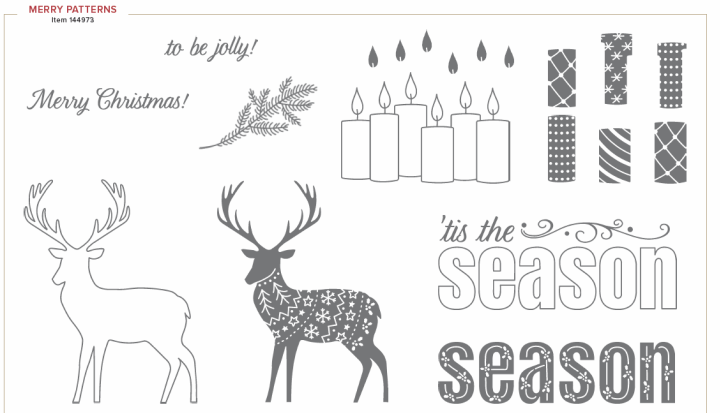
All the products mentioned above can be purchased on my online store HERE. Make sure to add Host Code TJQH6PS2 to be entered in my draw to win the exclusive Merry Patterns stamp set. To qualify place a $50.00 order (not including tax or shipping) by September 30th and you will be automatically entered. Canadian residents only. Draw will be held on October 1st.
Until Next Time !
Thursday, September 21, 2017
Throwback Thursdays
Another of my favorite SU Colors that has retired is Concord Crush. I love the deep richness to it. Today's card is featuring this color with Brocade Background DSP.

I have a few customers that still like the Lotus Blossom photopolymer set that was available during Sale-A-Bration January 6, 2015 to March 31, 2015.
On a piece of Very Vanilla measuring 2" x 4 1/4" I used Concord Crush Classic Ink with the 3 floral stamps either full strength ink and/or stamped off once. Mossy Meadow Classic Ink was used for the stems. The sentiment is from the same set using Tuxedo Black Memento.
Thanks for dropping by today.
Until next time !
Thursday, September 14, 2017
Throwback Thursdays
Welcome to my Throwback Thursdays. I'm excited to bring these ideas to you so that you may gather ideas on retired Stampin' Up! products. Almost Amethyst is one of my all time favorite Stampin' Up! colors. And, yes, when it retired I made sure I had plenty on hand.
The base of this card and designer paper is Almost Amethyst.

Using the Painted Petals Clear Mount Stamp Set, which I won at a Stampin' Up! demonstrator only event, I stamped the stems with Olive Green. The flowers were on the same stamp. Wanting a different effect I cut the stamp in two. Using Almost Amethyst Classic Ink I stamped it off once, doing this 5 times to the top of the stems. With the other part of the flower stamp I simply inked it with Almost Amethyst and stamped over the lighter version.
The Happy Birthday stamp is from Perfectly Penned using Basic Black Ink.
Until Next Time
Monday, September 11, 2017
Manly Mondays - Happy Birthday
I was in need of a Manly Birthday Card recently and it gave me enough encouragement to get back to posting Manly Mondays. Ideas came flooding and I thought I would start with this rather simple card.

When I fist saw the new In-Color Lemon Lime Twist I thought WOW that is bright!! I tend to shy away from bright colors. Once I saw it paired up with Basic Black I liked it. Which is how this idea came to be.
The base is Lemon Lime Twist. On a piece of Basic Black, the Happy Birthday Thinlit was die cut at an angle. Added 3 rhinestones in the corner, who says men don't like bling, and punched a balloon in the corner. Quick card and really easy to assemble.
Hope this gave you an idea to use this color combination.
Until next time!
Monday, May 23, 2016
Sale-A-Bration Birthday Card
I thought it was about time to crack open a Sale-A-Bration set - Botanicals for You.


Started with Soft Sky layered with Taken with Teal and Perfectly Artistic DSP. Ink used was Basic Gray Archival. All around the "just for you" I traced with a Sakura Gel Pen - Stardust Clear. In real life it real gives it a "wow" effect.
Enjoy!
Tuesday, May 3, 2016
Mother's Day Challenge for Paper Garden
I was approached a few weeks ago from Paper Garden to enter a Mother's Day Challenge. What an honor!! I was sent some very gorgeous paper to work with. Please vote for me here. Please be sure to submit under "vote for your fav" to click on Designed With YOU in Mind. All votes will be truly appreciated. Below is my entry and the details.

Paper: Essie Pearlized White and Stardream Kunzite from Paper Garden
Stamps: Teeny Tiny Wishes from Stampin' Up and Timeless Amour from Heartfelt Creations
Ink: Stampin' Up Archival Basic Gray
Die: Spellbinders Filegree Vase
Other: the flowers are from a dollar store that I felt really match the beautiful Stardream Kinzite
Thank you www.paper-garden.ca for the opportunity.
Sunday, April 17, 2016
Birthday Card
Hello Blogland. My it's been a long time since I have posted anything on my little blog. Thanks to those of you who have stuck it out with me. It's been a rough year but now moving forward to better things. My niece recently celebrated her 9th birthday and I wanted to make something a little special for her. So I referred to my "motivation book". Below is what I came up with. It's not my original design. An old post from someone (hanging head in shame) I did not have to foresight to keep the name. Only kept the picture. I modernized it a bit.

I used the colors Blushing Bride, Pink Pirouette, Whisper White and Sahara Sand. The skirt was made with velum using the large scallop punch.
The 5 x 5 card was made with the envelope punch board (soooooo easy). Added her name and a flourish.
Well that's it for now, getting a few things ready for a market this coming Saturday.

I used the colors Blushing Bride, Pink Pirouette, Whisper White and Sahara Sand. The skirt was made with velum using the large scallop punch.
The 5 x 5 card was made with the envelope punch board (soooooo easy). Added her name and a flourish.
Well that's it for now, getting a few things ready for a market this coming Saturday.
Sunday, March 29, 2015
Spring is in the Air
I've been working on some cards for upcoming market. This is one of them.

The base is Very Vanilla followed by a layer of Very Vanilla. Then, I cut a piece of Chocolate Chip Co'Ordination paper and ran it through the Big Shot using the Beautifully Baroque Embossing Folder which was lightly sanded.
The Typeset Designer Paper was daubed around the edges with Kiwi Kiss. This is a color I rarely use and I am quite happy with the color combination. The dress was cut using the Dress Up Framelits with the Bella Rosa Designer Paper. I wrapped that up with Stampin' Up Ribbon Originals from my stash and made a flower using the simply pressed clay with the blossoms Simply Pressed Clay Mold. Once the flower was dry I daubed that with Kiwi Kiss to give it a little texture.
Hope you've enjoyed viewing this card.
Until next time!
Friday, January 23, 2015
Random Act Of Kindness
This year I decided that I would do 1 Random Act of Kindness (RAK) every single month. I won't necessarily seek someone out, it will just happen when I think it should. Here's the story for January.
I've been on Facebook quite a bit as of late. I'm in a few local chat groups. Earlier this month a Mom posts about her child being robbed in the bathroom of a mall. No fears, the child was not hurt. The little one left her purse behind and when she realized it 2 minutes later the Mom and daughter go back to bathroom to discover that the purse was there but all that was inside had been taken.
From the written post is was obvious that the Mom was not seeking monetary compensation or anything of the like. Her frustration and sadness for her child just leapt off the screen. I asked her to send her address as I wanted to do something for her precious little one who happened to be at the mall spending the gift cards that she had received as gifts on others. That in itself was inspiring.
I haven't made a card for anyone under the age of 20 in so very long I wasn't sure where to begin. I keep a binder that I call "punch art" and came across a giraffe and the card below took flight.

I used quite a few Stampin' Up punches and the fringe scissors for the mane. The background you see on the Daffodil Delight cardstock is a retired background stamp called Leopard. I stamped it several times before I layered it with Early Espresso and patterned paper from my stash. To me it looks like the spots on a giraffe.
I can happily tell you that the little girl loves it and her Mom tells me that she was carefully inspecting it so that she could copy it. Best. Compliment. Ever.
Make it a real special day today and make someone smile.
Until next time!
Monday, December 8, 2014
Blog Hop - Tamara's Turn
I hope you enjoyed last week's blog hop. This week, it's Tamara's turn. A very talented and creative person, Tamara has an amazing blog that she shares a lot of her creative ability. You can find her post here for the hop. Next week will be Karina Chin's turn. Please be sure to come back to see what she has in store for us.
Until next week!

Until next week!
Monday, December 1, 2014
Blog Hop
My apologies for neglecting my blog this past year. Wow, a year!! Time flies. Health and life took a toll so I decided to take a break.
Recently, at a Stampin' Up Edmonton Fall Conference I met some incredible demonstrators. One is particular, Nicole Wetsch, who took me under her wing when we demonstrated how to use the Gift Box Punch Board. I found out that Nicole had purchased it at the Salt Lake City Convention this past July, which I attended, and went straight back to her hotel room to make a multitude of boxes. Wish I had met there!! I'm thankful that I did get to meet her as she gave me many tips on how to use this new to Stampin' Up tool. Not only that, she's an awesome person.
Nicole asked me to participate in this Canadian Blog Hop and I agreed. Not instantly :) but she gave me the incentive to start blogging again.
The scope of the hop is to answer 4 questions.
You can find Nicole's answers here with some great tips on how to use Paper Pumpkin.
Question 1 - What are you working on?
Working on renovating my crafting space affectionately called "The Art Studio". We've remodelled our downstairs, 1,800 sq feet with bathroom (yippeeee!!). We are the stage where I can start unpacking my Stampin' Up supplies and get crafting. I've really missed it. Once it's all clean and organized I will be sharing pictures, perhaps even a video.
Question 2 - How does your work differ from other in your genre?
I like to think that my work differs by way of making it personal for the recipient. Hence the "Designed With You In Mind". I try to find out what a person's hobbies are and favorite colors and go from there.
Question 3 - Why do you create what you do?
It gives me an outlet to spend time by myself and get creative. I love the challenge of finding the perfect fit. It also helps me to escape the ever changing world outside. Can I say, People, Learn how to drive on winter roads!!
Question 4 - How does your creative process work?
My creative process works in many ways. I love photography and take pictures all the time. I keep a folder on my computer called Cards To Make where I put pictures that I have taken be it from outside, in a store, of my dogs playing, even from TV. I once took a picture of a carpet off of the reality show Big Brother and made a card from that.
It's my turn to nominate someone for the Blog Hop. I've nominated Tamara Bertram. Another awesome demonstrator that I met at the Edmonton Fall Conference. Tamara is a successful demonstrator who has a lot to share on her blog. I just love the recent Marble Technique Tutorial that she posted.
Come back next week and I will post a link to her blog so you can see how she answers the above 4 questions.
I'm fortunate that I will get the opportunity to spend time with both Nicole and Tamara on Wednesday night at the Stampin' Up Catalog Reveal Event in Edmonton. Can't wait to see what the 2015 Sale-A-Bration holds in store for us.
I have crafted a little this past year and here a few cards that I have made. They are rather self explanatory and not all supplies used are Stampin' Up. I think I CASED these???


I couldn't leave without sharing a picture of Frankii and his little brother Jake. Little is an understatement!
.JPG)
As you may recall Frankii is the tan one. The black one is Jake when we first got him in September 2013.
Look at them now a year later....

I swear he's grown some more since I took this picture in September!! It's a bit blurry since I took this one with my phone.
Until next week!!
Friday, December 20, 2013
Freestyle Fridays
Regina is up this week. I love how her creative mind looks at things and come up with something jaw dropping. Here's a little look at her card for this week.

Look how she added the ribbon to the bottom of the stem...and the color combination. For a complete look and details please click here for Regina's full post. You won't be disappointed. And while there, please leave a little love by way of comment.
See Ya Next Week!
Friday, December 13, 2013
Freestyle Fridays
My long time Vet has decided to retire. Although I am sad he has decided to do so I am thrilled that he will be working only on Saturday mornings. This is a good thing for Frankii as he quite likes him. This Dr. has taken care of 3 dogs I've had since 1981 and has done so with the utmost care of all of them including me. I'll never forget the tear he shed when it came time to euthanize Tex. I will be delivering this card with a good bottle of scotch tomorrow, weather permitting. Can someone please call Mother Nature and let her know we've had enough snow!!

I've called him a Rock Star for quite some time and it always adds an extra glint to his eyes. On a base of Crumb Cake I did two layers of Very Vanilla and added Old Olive and Crumb Cake designer papers. On the Very Vanilla I daubed Early Espresso to give it a little depth. The crown from Grunge Rock was stamped in Early Espresso. The You is also stamped with Early Espresso but in marker form. It's from a sentiment from the Lots of Thanks set. The star is a die cut from Die-Namics - Accent It Rock and Roll. I cut it with Not Quite Navy and sprayed the bigger one with Vanilla Shimmer Smooch Spritz. I really like how this turned out. To make sure the Star stuck really good I used Spray Mount. Adding a rhinestone just seemed to add that extra touch.
********REGINA'S MISSION********
Ok Regina for this week your mission will be to use a marker, color of your choice, to add a sentiment or part of an image. Something a little different for you to try.
You all have a great week and please call on the Sun to make an appearance. Haven't seen it in over a week!
See Ya Next Week!
Friday, December 6, 2013
Freestyle Fridays
Regina was to create using Strawberry Slush and ribbon this week. Doesn't this box look the cutest! From the looks of this sneak it's perfect timing for all the colds and flus going round and round this time of year. I know I can use a bowl of soup everyday until this cold weather decides to warm up. Which, by the way, in these parts won't be until early/late May.

You can find Regina's post here with all the in and outs. She's used a variety of products that will interest you. Best of all, leave her a comment on how much you like it. She'll love that!
See Ya Next Week!
Friday, November 29, 2013
Freestyle Fridays
A few weeks ago Regina did me a huge favor and knowing her love of vintage, ribbons and buttons, I sent her this card. Hopefully by the time she reads this it will have arrived.

I picked out the DSP first, in this case, Everyday Enchantment, and built it from there. I thought Strawberry Slush would make a great base and by the way, you hardly see it used. The die from Dress Up was cut with Very Vanilla and using a dauber I applied Early Espresso. I actually "sewed" the buttons from the Artisan Embellishment Kit with Linen Thread. A first for me! To make the thread thingy (I have no idea what it's called) I used a dog bone die and cut off the edges. I tried to had cut one and it came out all lopsided and that just wouldn't do. I then wrapped some linen thread around that. The sentiment is from the Another Thank You Photopolymer Set. Also added some non-SU crochet trim. I got the original idea from a mini thank you card I received from placing an online order from a die company last year. It's been sitting on my craft table all this time waiting to be replicated.
Thank you Regina for helping me acquire a much loved necklace. I couldn't have done it without you!
********REGINA'S MISSION********
As mentioned above, Strawberry Slush is hardly ever seen in cardmaking. Maybe it's because the sun is setting sooner? Not sure. Anyhow, Regina, your mission this week, and as always, if you choose to accept it, is to use Strawberry Slush AND ribbon. Now get those ideas flowing and get creating :)
See Ya Next Week!
Subscribe to:
Posts (Atom)